Wednesday, May 27, 2009

More work on the spider, model mostly complete

For now at least...

This was fun to work on :) I'm not very happy with the materials that I have on it, however that's a whole new can of worms to deal with. This version shows use of sculpt nodes and several different subdivision SOPs that refine the initial subdivisions even more to use for sculpting with the Sculpt SOP.

From Learning 3D


I kind of like the way this shot came out:

From Learning 3D


Sadly I made a mistake in how the abdomen joins the thorax, and this results in an ugly crease or warp in the mesh that is really annoying. Fixing it would be possible but then the new primitives would screw up some of the later groups, or other nodes that refer to specific points/primitives, so I left it alone.

However I was able to repeatedly go "back in time" and alter bits of geometry, and or even make some drastic changes. From what I have seen watching videos with Maya on 3DBuzz, this would simply not be possible. For example, I'm able to keep my low level polygon mesh, tweak that, and then go back down the node graph to the high res subdivision mesh and make changes there as well with out ever having to discard either. Houdini rocks!

From Learning 3D

Wednesday, May 13, 2009

The Itsy, Bitsy, Spider...

Working from a set of lessons at 3D Buzz, I was able to duplicate the spider geometry below using Houdini. The lessons themselves were done with Maya, so hopefully I didn't lose to much in guesstimating the equivalent tools to use in Houdini. It's not quite finished, but I was pleasantly pleased with how far I got (only 2 more legs to go!):

From Learning 3D


From Learning 3D


From Learning 3D

Saturday, May 9, 2009

Krypton's last days

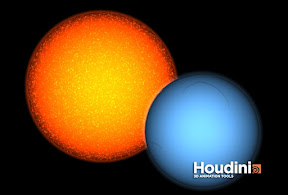
Playing with some shaders, using Houdini's built in Lava, Ice, and Glow shaders:

From Learning 3D


From Learning 3D


From Learning 3D

Thursday, May 7, 2009

Playing with the camera

This is a test of animating the camera along a path, and then animating the path itself. Also played with animating an L System tree by animating various properties based on the current frame value.

Wednesday, April 29, 2009

More MIEF starship work

1st video in Houdini! Not horribly exciting, just a test to see the animated channels put to use:

Monday, April 27, 2009

Bob Loves Houdini!

Without further ado, I'm proud to present the initial model of CodeProject's Bob, moved into Houdini and ready for rigging! Hopefully after going through the rigging tutorials at 3D Buzz I'll be ready to set him up for animations!

From Learning 3D


In the meantime he's some screenshots of how he got his start.

I modeled the initial mesh in Blender, simply because at the time it was easier and faster for me to do so. I started with a simple body with a head, body, arms and legs as separate objects.

From Learning 3D


From Learning 3D


Then I started to bring the shapes together, with the goal of creating a single body mesh in a neutral pose. This is the chest and arms together:

From Learning 3D


Now the legs added:

From Learning 3D


Merging the head together (Bob was under anesthesia, so PETA doesn't have to worry at all...):

From Learning 3D


Finally some initial work with setting up armatures in Blender.

From Learning 3D


At this point I decided to really devote the time to Houdini, so I exported the various body bits as Wavefront (.obj) files, and then use Geometry nodes in Houdini to import them in, added a few lights, some materials, and voila!:

From Learning 3D


From Learning 3D

Further work on the ship.

This isn't much, but I did re-org the network a bit, and since I've learned about the Object Merge node I realized I can have a subnet with a bunch of various details, things like panels, nozzles, etc, and then just reference them in using the ObejctMerge node.

So I have stuff like:

From Learning 3D


From Learning 3D


From Learning 3D


From Learning 3D


From Learning 3D