Tuesday, February 28, 2012

Monsters!

Felt like fooling around in ZB some more. I got interested in trying to make some other creature sculpts.

This guy is some sort hunter beast. Maybe you can use it to eat your neighbor's yippy little dog that wakes you up at all hours of the morning...
From 3D 2012


This guy got started after looking at H.R. Gigers concept art for Alien. Fantastic stuff, if a little weird. So I thought I'd take a stab at making something in that direction.

From 3D 2012


From 3D 2012


From 3D 2012


From 3D 2012


From 3D 2012


So that was going well, I got curious what it would look like rigged up and in an environment. So I went into Messiah and rigged up a simple rig (spent most of the time trying to remember how to rig up the IK joints), then created a simple environment in Modo. First shot's darker with more detail (higher AA rates in the renderer), second is brighter to see more the background. The creature itself is not rendered with the displacement on, it's just the simple base mesh used for animating.

From 3D 2012


From 3D 2012


Then thought, "well everyone gotta get around, right? The Universe is a big place after all", so Voila! a quickie space ship to experiment with.
From 3D 2012


From 3D 2012

Monday, February 13, 2012

Tron Lives!

Some improvements to the Tron character, fixed issues with the materials in Houdini.

From 3D 2012


From 3D 2012


From 3D 2012

Thursday, February 9, 2012

Blowing crap up - breaking Sierra out of the Safehouse

Somehow Sierra needs to escape from Flynn's safehouse. What better way than to blow out the front window and leap to her almost certain segment fault and imminent core dump.

First some experiments with trying to get the safehouse wall built correctly:
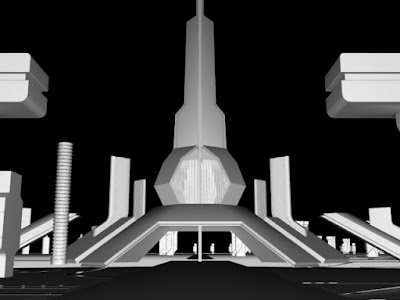
From 3D 2012


From 3D 2012


Then the insides

From 3D 2012


Another one, changing the displacement direction a bit

From 3D 2012


From 3D 2012


The basic safehouse and inner room are modeled in Modo. Then the rest of the details are added procedurally in Houdini. The wall has a bunch of points scattered onto it and then bunch of various sized parallelogram-like shapes are copied onto the points. This gives the basic "texture" to the wall, and then a custom displacement map made in Photoshop does the rest.

The glass shatter is done using a couple of techniques. First I bring in the glass "pane" and then strip it down to flat surface and chop off the ends giving me a rectangular area that's then converted to a NURBs surface. This is what I'll creep the grid onto. The grid is created and set up to have basically square blocks. Then I apply a technique I picked up from Peter Quint's tutorial that basically breaks up the grid in squares of 3 different sizes. He uses a technique to assign random numbers to the prims, then groups the prims into low, medium, and high groups. The low group is left alone, the mid group is subdivided once (no smoothing), and the high group is subdivided twice. I also used a weight attribute to refine this so that the randomness is more heavily applied on the prims closer to the center than at the edges.

Once I have this I partitioned up, the squares end up with a set of geometry objects with a point cloud for each low, mid, and high groups and the points centered on each primitive. I made a single cube for each low, mid, and high groups of the same thickness. All this gets brought into a Houdini DOP context and using 3 different RBD point objects (one for each low, mid and high group), are merged and then attached to a rigid body solver configured for ODE. A group DOP is added and an active DOP to turn off some of the cubes along the edges, and then a fan, with a noise field, and gravity DOPs. Simulation takes about 1-2 minutes per frame (this is using Houdini 10 - fingers crossed that this will improve quite a bit in H12). The final number of object being simulated is a little over 8900 objects.

From 3D 2012


Around 3000 objects:

From 3D 2012


Final count: over 8900 objects

From 3D 2012


From 3D 2012


And a final thought, some test pre-viz animation for how Sierra is gonna haul ass outta here...

test shot 1 previz, version 3 from Jim Crafton on Vimeo.


Similar, a bit longer, with different cuts.

test shot 1 v4 from Jim Crafton on Vimeo.

Tanks!

Yeah, just in case, thought I might need a tank, who knows, it might not get used...

Actually in hind sight I need to re-do this, there's stuff that just doesn't work.

Anyhow, as usual I turned to the concept art of Daniel Simon for this:
http://danielsimon.com/tron-legacy-light-tank/

Awesome artwork. For a day or two of fiddling around I came up with this:

From 3D 2012


From 3D 2012


From 3D 2012


From 3D 2012


From 3D 2012


From 3D 2012


From 3D 2012

Building yet another Tron character

This time I thought I'd do a quickie ZBrush sculpt (or as quick as I can work in ZBrush, which is not very fast) of Tron, just in case I needed him...

I started with the Modo Man base mesh, chopped off his toes and rebuilt them to work as shoes. This was brought into ZB and I used the polish brushes to kind of sculpt some rough planes on the surface until I had a basic look that I wanted. I wanted to roughly follow the concept art for Rinzler.

Brought this up to it's highest subdivison level and cloned it, and removed all the lower subd levels. This gave me a really high poly model to generate groups for the various suit parts. I masked out what I wanted, and poly grouped each section, used group loops to add mo details, and then used masking on the appropriate groups to inflate just the parts I wanted.

I then added in a tube holder on the right leg, then re-projected the whole thing back over to the original mesh. This then got brought back into modo to retopologize the holder area a little better and then re-projected as needed back in ZBrush.

Then I started to setup the texture maps for him. I generated these using a combination of ZBrush's UV Master and modo (for the head), and then used the high-res polygrouped model to generate poly paint per polygroup. Once this was transfered back to the UV'd version of the model, it's possible to generate a texture map that you can use in PS to isolate any part of the model. I used this to generate alpha maps for the neck and waist details.

From 3D 2012


From 3D 2012


From 3D 2012


From 3D 2012


From 3D 2012


And finally a (not very good - yet) render in houdini...

From 3D 2012


Note to zbrush/houdini fans out there - when you bring in the displacement map, remember to consider using the values in the Dicing tab of your geometry container that contains the geometry. If the displacement looks a little rough, try upping the Shading Quality (and possible the Ray Shading Quality) from the default of 1 to 2. This made a hugely noticeable difference in the renders and didn't seem to make much of any noticeable difference in render times.

More updates: Tron City

Some work done shortly after the holidays...

This is initial work for the Tron City set, gradually working out how to build the city using procedural techniques. Individual buildings are modeled in Modo then incorporated into a larger set in Houdini.

The technique I'm using is something as follows:

A rough map of building elements and road ways is laid out using Moi 3d - you can get really precise curve control. I'm using some images of circuit boards to get ideas for where to put the roads. The map is imported into PS as an AI file, and then I layer on colored shaped for where the buildings would be placed. This color file is then brought into Houdini where it's imported into the Compositor (COPs) module. This is used to generate a series of B&W image maps for each "layer"/color of buildings so I can control things a little better. The colors are masked out separated using a Rotoscope node. The idea is borrowed from David Gary's CMIvfx tutorial on city building.

Then I reference each of these different layer nodes in a geometry context and build up a series of points (placed at the center of each primitive that is traced out from the B&W image). These points get pumped into a Copy SOP. Buildings are loaded by ID (which in turn get glommed into a file name that is then loaded up) and the ids can vary by adjusting a ramp control. The ramp control get's fed the current item being copied, and you can vary it visually. All of this is done inside a custom SOP VOP. Right now I have 23 different building types that can be loaded up. Some of them aren't so hot though and probably need to be redone. In addithttp://www.blogger.com/img/blank.gifion the density is nowhere near high enough, but at least the system is in place to tinker with.

The road is also procedurally generated. The road map generated from Moi is exported as an IGS file, imported into Houdini, cleaned up a bit, and then each curve is used as a path to generate a road based on some road profile. This also automatically generates the UVs using techniques from Kim Goossens' CMI Vfx tutorial on road creation.


From 3D 2012


From 3D 2012


From 3D 2012


From 3D 2012


From 3D 2012


From 3D 2012